Monday 25 July 2016

Step by Step R12.1.3 to R12.2.4 Upgrade

Step by Step R12.1.3 to R12.2.4 Upgrade

The following Post gives the Step  by Step Upgrade from R12.1.3 to R12.2.4 .

   Operating  Prerequisites please refer by previous blog .


1. Steps to Upgrade from R12.1.3 to R12.2.4

2. Upgrade Grid home   opatch  as per the latest opatch

3. Upgrade Database Opatch version

4. PSU 8 applied on Grid home  and Database home   as per Preq from the Note ID :- 1147107.1

5.. Add the service name ebs_patch required for Upgrade .
a. ALTER SYSTEM SET recyclebin = OFF DEFERRED;
b. Alter system set  _SYSTEM_TRIG_ENABLED=true
c. alter system set service_names='SAM','ebs_patch' ;

6. Backup of Custom.pll and custom.plx .
backup of custom.pll and plx from $AU_TOP/resource

7. JRE upgrade to 1.7 on Database tier.
copy the jre to db tier to appsutil

8. Autoconfig on DB Tier all nodes to make changes in java
./adautoconfig.sh

9. Gather Schema statistics :-
SQL>FND_STATS.GATHER_SCHEMA_STATISTICS ('ALL', 10, :parallel_degree, 'NOBACKUP', NULL, 'LASTRUN', 'GATHER AUTO', 10, 'N');
or from front end run gather schema statistics.

10. pre upgrade patch on R12.1.3.
Patch :- 13420532   using adpatch

11. Update the pfile required for the Upgrade.
As per Note ID :- 396009.1

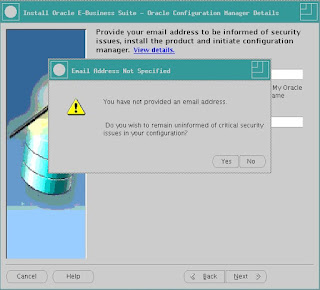
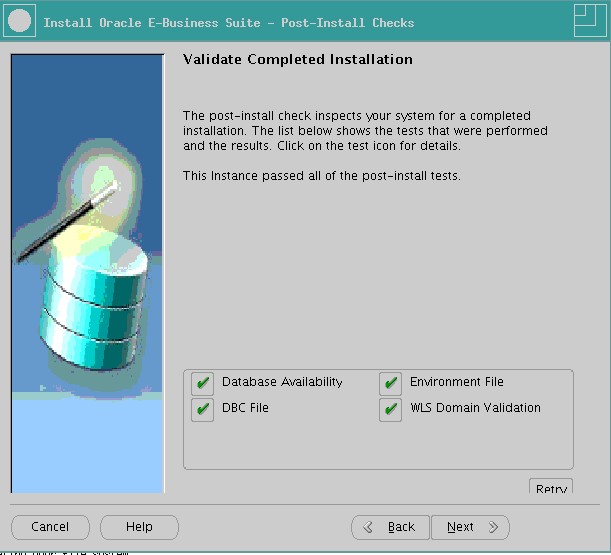
12. Run Rapidwiz to kick off installation
./rapidwiz


Ignore Temp space as min. of 2GB is sufficient for installation.


13. Configure Scan listener.
show parameter remote_list;
alter system set remote_listener='SAM-scan:1521' scope=both ;

14. Enable Maintenance Mode using adadmin  using the fs1 environment:
1) Run environment file of application file system.
2) $adadmin
3) Select Change maintenance mode
4) Select enable maintenance mode.
5) Exit

15. Apply AD 12.2 upgrade driver  10117518 as per readme on fs1
as per the note ID :- 1320300.1   and the patch readme  apply the patch by merging the patch.

16. Compile apps schema as per the post patch install steps:-
adadmin to compile apps schema from fs1

17. Merge Patch CUP6 with NLS driver file . (10124646) .
19796566 CUP6 merge with patch as per Note ID :- 1320300.1
21632403   }
19971946   }
 merge patches by admrgpch -s 19796566_merge -d 19796566_mrg
  ---> merge these three patches and apply the merged patch in adpatch preinstall=y

18. American English upgrade patch driver (Merge Driver)
$ cd $AU_TOP/patch/115/driver
$ admrgpch -d . -preinstall -master u10124646.drv
adpatch options=nocopyportion,nogenerateportion   --> give the new merged driver

19. Disable Maintenance mode.

1) Run environment file of application file system.
2) $adadmin
3) Select Change maintenance mode
4) Select disable maintenance mode.
5) Exit


20. Create new appsutil.zip from the fs1 filesystem.
1) Run environment file of application file system.
2) $perl <AD_TOP>/bin/admkappsutil.pl
3) Copy to RDMBS_HOME (DATABASE HOME)
4) unzip -o appsutil.zip

21. Refresh 12.2 appsutil to the database Tier
unzip appsutil.zip file created in the apps tier  on the dbtier by taking the backup of new context file and copy 1.7 jre to new appsutil

22.  Generate a new database context file
1) $cd <RDBMS ORACLE_HOME>/appsutil/bin
2) $perl adbldxml.pl

23. Autoconfig on the DB tier all nodes
cd $ORACLE_HOME/appsutil/bin
./adconfig.sh    and pass context_file path

24. Autoconfig on the Application tier .
1) Run environment file on apps Tier.
2) Login to as apps/apps user
3) Prior to running AutoConfig check if table - ADX_PRE_AUTOCONFIG is existing in APPS schema:
Select object_name, object_type, owner, status from dba_objects where    upper(object_name) = 'ADX_PRE_AUTOCONFIG' and object_type='TABLE' and upper(owner)='APPS';
Cd $AD_TOP/patch/115/sql
Sqlplus apps/******
Sql> @txkDropAdxPreAutoConfig.sql
cd $ADMIN_SCRIPTS_HOME
./adautoconfig.sh

Configure Release R12.2 E-Business Suite Instance.

25. Rapidwiz  to configure the R12.2 environment
Rapid Install  second time to complete the configuration using Run File System context file.
./rapidwiz


26. Adsplice for custom schema register

adsplice utility

27. Online Patching Enablement - Readiness Reports (ADOP)
sqlplus system @$AD_TOP/sql/ADZDPSUM.sql
mv adzdpsum.txt adzdpsum_post_dbprep.txt
sqlplus system @$AD_TOP/sql/ADZDPMAN.sql
mv adzdpman.txt adzdpman_post_dbprep.txt
sqlplus system @$AD_TOP/sql/ADZDPAUT.sql
mv adzdpaut.txt adzdpaut_post_dbprep.txt
    Note:-  As per the outputs generated do the action plan provided in the outputs.

28. Installing the ETCC Patches on DB Tier as per the patch 17537119.
ETCC for DB  Note ID :- 1147107.1 and 1594274.1
Using opatch utility apply all the patches required for Oracle Home

29. Installing the ETCC Patches on ApplicationTier as per the patch 17537119.
ETCC for Middle Tier Note ID:-  1594274.1
Using opatch utility apply all the patches required for ""Oracle Forms and Reports""
""Oracle Fusion Middleware (FMW) - Web Tier""
""Oracle Fusion Middleware (FMW) - oracle_common""
""Oracle WebLogic Server (WLS)""   for weblogic use below bsu.sh commands to apply
weblogic patches   cd /opt/oracle/product/UAT12.2/fs1/FMW_Home/utils/bsu
apply patch :- $ bsu.sh -install -patch_download_dir=/opt/oracle/product/UAT12.2/fs1/FMW_Home/utils/bsu/cache_dir -patchlist=1LRI -prod_dir=/opt/oracle/product/UAT12.2/fs1/FMW_Home/wlserver_10.3
remove patch :- $ bsu.sh -remove  -patchlist=1LRI -prod_dir=/opt/oracle/product/UAT12.2/fs1/FMW_Home/wlserver_10.3

30. Verify database tablespace free space
echo $HOSTNAME
apcappsx2.in.oracle.com
export HOSTNAME=apcappsx2
perl $AD_TOP/bin/adzdreport.pl apps
1. Select option 3 - 'Other Generic Reports'
2. Select the next option - 'Free Space in Important Tablespaces'
SYSTEM Tablespace: has a minimum of 25 GB of free space
APPS_TS_SEED Tablespace: has a minimum of 5 GB of free space

31. Online Patching Enablement - Status Report
cd $LOG_HOME/appl/op
sqlplus <Apps Username> @$AD_TOP/sql/ADZDEXRPT.sql
sqlplus <Apps Username> @$AD_TOP/sql/ADZDDBCC.sql  patching database compliance checker.

32. Online Patching Enablement patch (13543062 :R12.AD.C.)
adpatch options=hotpatch,forceapply
sqlplus <apps Username> @$AD_TOP/sql/ADZDSHOWDDLS.sql  to check the patching queries.
exec sys.utl_recomp.recomp_parallel    ---> Compile invalid objects .

33. Online Patching Enablement Status Report after the Online Patching
cd $LOG_HOME/appl/op
sqlplus <Apps Username> @$AD_TOP/sql/ADZDEXRPT.sql
sqlplus system @$AD_TOP/sql/ADZDPSUM.sql
mv adzdpsum.txt adzdpsum_post_dbprep.txt
sqlplus system @$AD_TOP/sql/ADZDPMAN.sql
mv adzdpman.txt adzdpman_post_dbprep.txt
sqlplus system @$AD_TOP/sql/ADZDPAUT.sql
mv adzdpaut.txt adzdpaut_post_dbprep.txt
sqlplus <Apps Username> @$AD_TOP/sql/ADZDDBCC.sql  patching database compliance checker.

34. Apply AD and TXK patches of Delta 7

      As per the AD.C  Delta 7 Readme.txt run adgrants.sql from the db node.

adop phase=apply patches=20745242,21841288 hotpatch=yes merge=yes
adop phase=apply patches=20784380,21846184 hotpatch=yes merge=yes

35. Applying the Upgrade patch  from R12.2.0 to R12.2.4 patch
adop phase=apply patches=19829320 hotpatch=yes
adop phase=apply patches=17919161,21900859 merge=yes

36. Clean and Fs_clone a phase to clear all the fs2 and once again clone from fs1
adop phase=clean
adop phase=fs_clone
37. Online help patch :-
adop phase=apply patches=17919162,19290141 hotpatch=yes merge=yes

38. Post Upgrade Critical Patches by  ADOP
Patch 19494816 - Oracle Application Object Library
Patch 19807163 - Oracle Applications Manager
Patch 19858552 - Oracle Application Framework
Patch 21619282 - Oracle Application Framework
Patch 19891697
Patch 18345006 - Oracle Application Framework
Patch 21440868 - Oracle Workflow
Patch 21483810 - Oracle Application Object Library

Upgrade from R12.1.3 to R12.2.4 is completed in primary node , Need to add multi nodes in SHared file system.

39. Adpreclone on the appstier to add other application nodes.
pairs file exists in $INST_TOP/appl/admin the for example -- /opt/oracle/product/fs2/inst/apps/SAM_hostname1/appl/admin/SAM_hostname1.txt.  edit the file according to the second node.
 
Add a Node :-
export PATH=/app/upg/1224/fs2/FMW_Home/webtier/perl/bin:$PATH
$ cd /app/upg/1224/fs2/EBSapps/comn/clone/bin
$ perl adclonectx.pl addnode contextfile=/app/upg/SAM_hostname1.xml pairsfile=/app/upg/SAM_hostname1.txt dualfs=yes
                   
Delete a Node :-
if the context file doesnot exists than create a temporary xml file from first node and
perl /app/upg/1224/fs2/EBSapps/appl/ad/12.0.0/patch/115/bin/adProvisionEBS.pl ebs-delete-node -contextfile=/opt/oracle/product/fs2/inst/apps/SAM_hostname3/appl/admin/SAM_hostname3.xml -logfile=sam.log


Note:
Ensure the following while setting values in the pairs file:
The value of 's_shared_file_system' should be set to 'false' and the value of 's_atName' should be set to the hostname of the node being added.
The port pool provided for the Run Edition File System is different from the port pool of the Patch Edition File System of the primary node. Otherwise, it will result in errors during execution of fs_clone. As mentioned earlier, the function (run or patch) of the two file systems is not static, and their values switch every time when a cutover phase is complete. Hence, refer to the environment variables $RUN_BASE and $PATCH_BASE to determine the Run Edition File System and Patch Edition File System respectively.
The value of 'patch_s_port_pool' for the port pool of the Patch Edition File System is provided correctly.

Oracle CRS troubleshooting

Oracle CRS troubleshooting

This post is related to CRS 11.1.0.7, but concept and fundamentals remains same in all versions. I am writing this because this is what I faced in 11.1.0.7 after applying a PSU patch and running root.sh followed by patch application.

Problem Description:

DBAs often face a problem where crs_stat -t (or crsctl stat res -t in 11gR2 or later) doesnt gives the output or CRS doesnt comes up after patching. or CRS comes up but doesn’t display its registered services. I faced this issue with a 3 node cluster on Linux 5.11. Plan was to upgrade CRS from 11.1.0.7 to 11.2.0.4 and latest PSU was required to be applied on 11.1.0.7 as a prereq of upgrade. PSU (11724953) was applied successfully but got following errors while running postrootpatch.sh:

./postrootpatch.sh -crshome /grid/app/oracle/product/11.1.0./crs

Checking to see if Oracle CRS stack is already up…

Checking to see if Oracle CRS stack is already starting

Startup will be queued to init within 30 seconds.

/bin/sh: /grid/app/oracle/product/11.1.0./crs/bin/crsctl: Permission denied

/bin/sh: /grid/app/oracle/product/11.1.0./crs/bin/crsctl: Permission denied

/bin/sh: /grid/app/oracle/product/11.1.0./crs/bin/crsctl: Permission denied

/bin/sh: /grid/app/oracle/product/11.1.0./crs/bin/crsctl: Permission denied

/bin/sh: /grid/app/oracle/product/11.1.0./crs/bin/crsctl: Permission denied

/bin/sh: /grid/app/oracle/product/11.1.0./crs/bin/crsctl: Permission denied

/bin/sh: /grid/app/oracle/product/11.1.0./crs/bin/crsctl: Permission denied

/bin/sh: /grid/app/oracle/product/11.1.0./crs/bin/crsctl: Permission denied

Then I did the following steps as suggested by Oracle support :

run <CRS_HOME>/install/rootdelete.sh, it will remove the init* scripts and place back the blank inittab
<CRS_HOME>/install/rootdelete.sh
run <CRS_HOME>/install/rootdeinstall.sh, it will blank out the $ORACLE_HOME/cdata/localhost/local.ocr and remove the ocr.loc <CRS_HOME>/install/rootdeinstall.sh
run <CRS_HOME>/root.sh, CRS should start automatically after this.
<CRS_HOME>/root.sh
Confirm that the Node Clusterware has started successfully
crs_stat -t
Only if all looks Ok in Step 4 repeat for next node
But no use, Then Oracle provided another plan :

Check the permissions of /grid/app/oracle/product
ls -al /grid/app/oracle/product – You should see Oracle user doesnt have permissions i.e. its likely set to 700

Change the permission of directory /grid/app/oracle/product to 777 i.e. chmod 777 /grid/app/oracle/product
Rerun the delete command
./rootdeinstall.sh
Check permissions again and make sure Oracle user has permissions i.e. its not just set to ROOT (700)
ls -al /grid/app/oracle/product

Now run root.sh again i.e.
But this didn’t help, rather as soon as I use to ran root.sh, server use to reboot and never came up. Actually to bring the server up, I had to start the server in single user mode and comment CRS starting scripts in init.d and then started the server in normal mode. This was a serious permission issue.

Then I repeated the above steps and ran root.sh in debug mode (sh –x root.sh). It displayed hell lot of output but in the end it displayed :

/grid/app/oracle/product/11.1.0./crs/bin/crsctl: Permission denied

Then I changed the permissions as follows :

Set the ownership of all directories to be owned by oracle i.e.
chowm -R oracle:dba /grid/app/oracle/product/11.1.0./crs
./rootdeinstall.sh
./root.sh
It fixed the issue and brought CRS up on 1 node: ps –ef |grep d.bin started showing the nodeapps services up and running. But …

crs_stat command gave following error :
PRKH-1010 : Unable to communicate with CRS services.

Checked various log files — cssd.log, evemd.log, crsd.log). Although there were many error messages but those were not clear.

Then tried I set the trace level to 2 and tried to manually start nodeapps on 1 node as follows:

[oracle@ldsfsxs012q ~]$ export SRVM_TRACE=true
[oracle@ldsfsxs012q ~]$ srvctl start nodeapps -n <hostname>

This gave following output/error:

[main] [10:50:33:911] [OPSCTLDriver.setInternalDebugLevel:173]  tracing is true at level 2 to file null

[main] [10:50:33:911] [OPSCTLDriver.main:116]  SRVCTL arguments : args[0]=start args[1]=nodeapps args[2]=-n args[3]=<nodename>

[main] [10:50:33:918] [OPSCTLDriver.<init>:96]  Security manager is set

[main] [10:50:33:924] [CommandLineParser.parse:193]  parsing cmdline args

[main] [10:50:33:924] [CommandLineParser.parse2WordCommandOptions:981]  parsing 2-word cmdline

[main] [10:50:33:949] [HASContext.getInstance:199]  Module init : 16

[main] [10:50:33:949] [HASContext.getInstance:222]  Local Module init : 19

[main] [10:50:33:949] [HASContext.<init>:92]  moduleInit = 19

[main] [10:50:33:959] [Library.getInstance:106]  Created instance of Library.

[main] [10:50:33:959] [Library.load:206]  Loading libsrvmhas11.so…

[main] [10:50:33:960] [Library.load:212]  oracleHome /ora/app/oracle/product/11.1.0/db_1

[main] [10:50:33:960] [sPlatform.isHybrid:63]  osName=Linux osArch=amd64 JVM=64 rc=false

[main] [10:50:33:960] [Library.load:238]  Loading  library /ora/app/oracle/product/11.1.0/db_1/lib/libsrvmhas11.so

[main] [10:50:33:967] [Library.load:262]  Loaded library /ora/app/oracle/product/11.1.0/db_1/lib/libsrvmhas11.so from path=

/ora/app/oracle/product/11.1.0/db_1/lib

[main] [10:50:33:968] [has.HASContextNative.Native]  prsr_trace: no lsf ctx, line=Native: allocHASContext

[main] [10:50:33:968] [has.HASContextNative.Native]

allocHASContext: Came in

[main] [10:50:33:968] [has.HASContextNative.Native]  allocHASContext: module_init = 19

[main] [10:50:33:968] [has.HASContextNative.Native]

allocHASContext: META context [1]

[main] [10:50:33:969] [has.HASContextNative.Native]

allocHASContext: LSF context [1]

[main] [10:50:33:969] [has.HASContextNative.Native]  prsr_trace: Native: prsr_initCLSS

[main] [10:50:35:617] [has.HASContextNative.Native]  prsr_trace: clsc_connect: (0x2b8e60164920) no listener at (ADDRESS=(PROTOCOL=ipc)(KEY=OCSSD_LL_ldsfsxs012q_))

[main] [10:50:35:618] [has.HASContextNative.Native]  prsr_trace: Native: clss error 3

[main] [10:50:35:618] [has.HASContextNative.Native]  prsr_trace: Native: prsr_freeCLSS

[main] [10:50:35:618] [has.HASContextNative.Native]  prsr_trace: prsr_throwException: oracle/ops/mgmt/has/HASContextException[Communications Error–Native: prsr_initCLSS]

oracle.ops.mgmt.cluster.ClusterException: PRKC-1056 : Failed to get the hostname for node <nodename>

PRKH-1010 : Unable to communicate with CRS services.

And on rest 2 nodes also CRS was not coming up at all.

Solution:

Solution was to actually reconfigure voting disk as follows because Voting disk was corrupted:

./crsctl stop crs –f
./crsctl query css votedisk
./crsctl delete css votedisk /dev/raw/raw4 –force
Successful deletion of voting disk /dev/raw/raw4.

./crsctl  add css votedisk /dev/raw/raw4 –force

./crsctl start crs

After this CRS comes up successfully.
Then manually add node for all 3 nodes:

srvctl add nodeapps -n <node1_name>  -A <public address>/<subnet_mask>/<interface_name like bond0 or eth0 etc>

srvctl add nodeapps -n <node2_name>  -A <public address>/<subnet_mask>/<interface_name like bond0 or eth0 etc>

srvctl add nodeapps -n <node3_name>  -A <public address>/<subnet_mask>/<interface_name like bond0 or eth0 etc>

Public IP address, subnet mask and interface name can be seen by “ifconfig -a” command. I am not giving any hostnames or IP addresses in this blog due to security reasons.

So once this is done start nodeapps as root user:

./srvctl start nodeapps -n <node1>

./srvctl start nodeapps -n <node2>

./srvctl start nodeapps -n <node3>

—–>>>> Super !! this comeup without any issues. <<<<——

Then add asm as follows:

./srvctl add asm -n <node1> -i +ASM1 -o /ora/app/oracle/product/11.1.0/asm

./srvctl add asm -n <node2> -i +ASM2 -o /ora/app/oracle/product/11.1.0/asm

./srvctl add asm -n <node3> -i +ASM3 -o /ora/app/oracle/product/11.1.0/asm

Then start asm. Similarly add database, instance, listeners etc.

Problem Solved !!!!!

UPGRADE 11.1.0.7 DATABASE TO 11.2.0.3 DATABASE WITH R12.1.3

UPGRADE 11.1.0.7 DATABASE TO 11.2.0.3 DATABASE WITH R12.1.3


11.2.0.3 is the latest release (at the time of writing this post) for the Oracle database. The intent of this guide is to upgrade the current database version from 11.1.0.7 to 11.2.0.3.

The installation procedure for the new Oracle Database 11g Release 2 (11.2) installs the Oracle software into a new Oracle home. This is referred to as an out-of-place upgrade and is different from patch set releases for earlier releases of Oracle Database, where the patch set was always installed in place. Oracle strongly recommends that you follow the steps in this procedure to ensure minimal downtime for the upgrade process and integrity of the new binaries and software libraries.

Also, Manual upgrade method has been used instead of DBUA for better control over the complete upgrade process.

Linux x86-64 is used as platform in the below guide

SOFTWARE SOURCES

You can obtain the 11.2.0.3 software from patch 10404530 on My Oracle Support

Files 1, 2 and 3 are sufficient to cover 11.2.0.3 database (including grid infra)


Part 1: INSTALL ORACLE 11.2.0.3 SOFTWARE


1.1) Check oratab file

Ensure that the oratab file contains an entry for the database to be upgraded


1.2) Check for installed languages

SQL> select LANGUAGE_CODE,LANGUAGE_ID,NLS_LANGUAGE,INSTALLED_FLAG from fnd_languages where INSTALLED_FLAG in (‘I’,’B’);
LANG LANGUAGE_ID NLS_LANGUAGE                  
—- ———– —————————— -
US             0 AMERICAN                       B
CS            30 CZECH                          I
D              4 GERMAN                         I


1.3) Install 11g database software

cd <software location>
./runInstaller

Below are the details of OUI screen and actions.


Screen 1: Configure Security updates

Leave blank and press next


Screen 2: Download Software updates

Check ‘Skip software updates’ and press next


Screen 3:  Select Installation option

Check ‘Install database software only’ and press next


Screen 4: Grid Installation options

Check ‘Single Instance database installation’ and press next


Screen 5: Select Product Languages

Choose English & all other languages required and press next

NOTE : You may select only ‘English language’ even if on EBS side you have many languages installed. The languages that we select during database install/upgrade through OUI are not related to what languages we install in EBS. If you select languages other than the English language, the Oracle installer will bring over extra *.msb files for the languages selected and the user/developer will be able to see “core” ora- messages in languages other than English too.


Screen 6: Select database edition

Check ‘EnterpriseEdition’


Screen 7: Specify Installation location

Input values of ‘Oracle base’ and press next


Screen 8: Privileged operating system groups

Take dba (or whatever group you created ) as OSDBA Group and press next


Screen 9: Perform prerequisite checks

Correct if anything is required to (by fix & check again) and press next


Screen 10: Summary

Check and press Install and press next


Screen 11a: Install

Installation will proceed.


Screen 11b: run root.sh scripts as instructed


Screen 12: Finish

This completes the database 11g installation.


Part 2: PRE-UPGRADE STEPS


2.1) Take Invalid Count

SQL> select OWNER,OBJECT_NAME,OBJECT_TYPE from dba_objects where STATUS=’INVALID';


2.2) Apply mandatory patches


Category a) For customers on E-Business Suite Release 12.1, apply:

Check in ad_bugs and apply whichever patch is not available. All the below patches need to be applied by adpatch

1) 9062910 (11g Release 2 interoperability patch for Release 12.1 )

2) 8919489 (12.1 TXK Delta 3 patch)

3) 9868229

4) 10163753


Category b) ) On 11.2.0.3 home, apply additional 11.2.0.3 RDBMS patches :

Apply the following patches (OPATCH) for all UNIX/Linux platforms:

NOTE: Do not run any of the post install instructions as those will be done after the upgrade.

1) 4247037
 There is a Special post patch Instructions (mentioned below), execute ONLY after database upgrade part is done

Post install steps:
cd $ORACLE_HOME/md/admin
connect to the database using sqlplus / as sysdba

SQL>@catmgdidcode


2) 9858539
There is a post patch install Instructions (step 3, mentioned below), execute ONLY after database upgrade is done

Post install steps:

Run following files as sysdba
cd $ORACLE_HOME/rdbms/admin
@catnomtt.sql
@catnomta.sql
@dbmsmeta.sql
@dbmsmeti.sql
@dbmsmetu.sql
@dbmsmetb.sql
@dbmsmetd.sql
@dbmsmet2.sql
@catmeta.sql
@prvtmeta.plb
@prvtmeti.plb
@prvtmetu.plb
@prvtmetb.plb
@prvtmetd.plb
@prvtmet2.plb
@catmet2.sql– recompile dbms_metadata_int to enable the diffing code

alter package dbms_metadata_int compile plsql_ccflags = ‘ku$xml_enabled:true';

— recompile dbms_metadata_util to enable the xmlschema load code

alter package dbms_metadata_util compile plsql_ccflags = ‘ku$xml_enabled:true';

3) 12942119

4) 12960302

5) 12985184

6) 13001379

7) 13004894

8) 13258936

9) 13366268


2.3) Run utlu112i.sql on existing 11.1.0.7 oracle database

Copy the Pre-Upgrade Information Tool (utlu112i.sql) from the Oracle Database 11g Release 2 (11.2) ORACLE_HOME/rdbms/admin directory to a directory outside of the Oracle Home, such as the temporary directory(/tmp) on your system.

Connect via existing 11.1.0.7 database and run utlu112i.sql

Below issue were found and were corrected


ISSUE  1

———-

**********************************************************************

Obsolete/Deprecated Parameters: [Update Oracle Database 11.2 init.ora or spfile]

**********************************************************************

–> plsql_native_library_dir     11.2       OBSOLETE

–> plsql_native_library_subdir_ 11.2       OBSOLETE


SOLUTION 1

—————-

commented out below values in init file

#plsql_native_library_dir = /u01/oracle/<instance_name>/db/tech_st/11.1.0/plsql/nativelib

#plsql_native_library_subdir_count = 149


ISSUE 2

———-

WARNING: –> Database is using a timezone file older than version 14.

…. After the release migration, it is recommended that DBMS_DST package

…. be used to upgrade the 11.1.0.7.0 database timezone version

…. to the latest version which comes with the new release


SOLUTION 2

————–

-ignore

Upgrade to 11.2.0.3. No need to apply DST patches on the 11.1.0.6 or 11.1.0.7 side first. You can skip any DST related upgrade instructions.

The 11.2.0.3 RDBMS DST version after the upgrade to 11.2.0.3 will be the same DST version as used in 11.1.0.6 or 11.1.0.7.


ISSUE 3

———–

WARNING: –> Your recycle bin contains 99 object(s).

…. It is REQUIRED that the recycle bin is empty prior to upgrading

…. your database.  The command:

PURGE DBA_RECYCLEBIN


SOLUTION 3

—————

<run PURGE DBA_RECYCLEBIN>


ISSUE 4

———-

Oracle recommends gathering dictionary statistics prior to

upgrading the database.

To gather dictionary statistics execute the following command

while connected as SYSDBA:


SOLUTION 4

—————-

<run  EXECUTE dbms_stats.gather_dictionary_stats;>


ISSUE 5

———-

Oracle recommends removing all hidden parameters prior to upgrading.

To view existing hidden parameters execute the following command

while connected AS SYSDBA:

SELECT name,description from SYS.V$PARAMETER WHERE name

LIKE ‘\_%’ ESCAPE ‘\’


Changes will need to be made in the init.ora or spfile.


SOLUTION 5

————–

Comment out all hidden variables in init file


2.4) Shut down Applications server processes and database listener


shut down all the application services running on Apps tier and also the database listener ( keep the database running)


2.5) Run dbupgdiag.sql on existing 11.1.0.7 oracle database

Run dbupgdiag.sql to find any duplicate objects in sys or system schema

Script to Collect DB Upgrade/Migrate Diagnostic Information (dbupgdiag.sql) [ID 556610.1]

It will ask for input directory to create log file

See the instructions/warnings/errors in log file produced and correct if anything


2.6) Purge DBA_RECYCLEBIN on existing 11.1.0.7 oracle database

SQL> PURGE DBA_RECYCLEBIN;

Note: Already done as corrective action in Step 2.3


2.7) Check Hidden Parameters on existing 11.1.0.7 oracle database

SELECT name,description from SYS.V$PARAMETER WHERE name LIKE ‘\_%’ ESCAPE ‘\';

Oracle recommends removing all hidden parameters prior to upgrading.

Note: Already done as corrective action in Step 2.3


2.8) Set the new environment for 11.2.0.3 oracle home

After the software installation of Oracle 11.2.0.3 you must set the environment variables to the new home.

export ORACLE_BASE=/u01/oracle/<instance_name>/

export ORACLE_HOME=/u01/oracle/<instance_name>/db/tech_st/11.2.0

export PATH=$ORACLE_HOME/bin:$ORACLE_HOME/perl/bin:$PATH

export LD_LIBRARY_PATH=$ORACLE_HOME/lib

export PERL5LIB=$ORACLE_HOME/perl/lib/5.10.0:$ORACLE_HOME/perl/lib/site_perl/5.10.0

export ORA_NLS10=/u01/oracle/<instance_name>/db/tech_st/11.2.0/nls/data/9idata


Make sure that The PERL5LIB environment variable points to the directories where the new perl libraries are located (usually $ORACLE_HOME/perl/lib/[perl version] and $ORACLE_HOME/perl/lib/site_perl/[perl version])


2.9) Create nls/data/9idata directory on new 11.2.0.3 home

Run the $ORACLE_HOME/nls/data/old/cr9idata.pl script to create the $ORACLE_HOME/nls/data/9idata directory.

After creating the directory, make sure that the ORA_NLS10 environment variable is set to the full path of the 9idata directory whenever you enable the 11g Oracle home.

$ perl cr9idata.pl

$ export ORA_NLS10=/u01/oracle/<instance_name>/db/tech_st/11.2.0/nls/data/9idata


2.10) Check for TIMESTAMP WITH TIMEZONE Datatype on existing 11.1.0.7 oracle database

The RDBMS DST patching has been greatly improved in 11gR2.

SQL> select TZ_VERSION from registry$database;

TZ_VERSION

———-

10

For Upgrade to 11.2.0.3, there is no need to apply DST patches on the 11.1.0.6 or 11.1.0.7 side first. You can skip any DST related upgrade instructions.

The 11.2.0.3 RDBMS DST version after the upgrade to 11.2.0.3 will be the same DST version as used in 11.1.0.6 or 11.1.0.7.


2.11) Check the National Characterset  on existing 11.1.0.7 oracle database

Check that the National Characterset (NLS_NCHAR_CHARACTERSET) is UTF8 or AL16UTF16.

select value from NLS_DATABASE_PARAMETERS where parameter = ‘NLS_NCHAR_CHARACTERSET';

If this is UTF8 or AL16UTF16 then no action is needed.

SQL> select value from NLS_DATABASE_PARAMETERS where parameter = ‘NLS_NCHAR_CHARACTERSET';

VALUE

———————-

AL16UTF16


2.12) Run Optimizer Statistics on existing 11.1.0.7 oracle database

When upgrading to Oracle Database 11g Release 2 (11.2), optimizer statistics are collected for dictionary tables that lack statistics. This statistics collection can be time consuming for databases with a large number of dictionary tables, but statistics gathering only occurs for those tables that lack statistics or are significantly changed during the upgrade.

$ sqlplus “/as sysdba”

SQL> EXEC DBMS_STATS.GATHER_DICTIONARY_STATS;


2.13) Drop SYS.ENABLED$INDEXES (conditional)

If the SYS.ENABLED$INDEXES table exists, use SQL*Plus to connect to the database as SYSDBA and running the following command to drop it:

SQL> drop table sys.enabled$indexes;

PL/SQL procedure successfully completed.

2.14) Disable Database Vault (conditional)


If you have Database Vault installed, perform steps 1 to 6 of Part 2 of document 1091083.1 on My Oracle Support to disable Database Vault.


Check>>

SQL> SELECT * FROM V$OPTION WHERE PARAMETER = ‘Oracle Database Vault';

PARAMETER                                              VALUE

—————————————————————-

Oracle Database Vault                                 FALSE

If the Value is ‘FALSE’ so no action is required.


2.15) Back up Enterprise Manager Database Control Data (conditional)

You may need to backup the EM data if you have installed.


2.16) Check for any logical corruption

To check for corruption in the dictionary, use the following commands in SQL*Plus (connected as sys):

—————————————————————-

Set verify off

Set space 0

Set line 120

Set heading off

Set feedback off

Set pages 1000

Spool analyze.sql

SELECT ‘Analyze cluster “‘||cluster_name||’” validate structure cascade;’

FROM dba_clusters

WHERE owner=’SYS’

UNION

SELECT ‘Analyze table “‘||table_name||’” validate structure cascade;’

FROM dba_tables

WHERE owner=’SYS’

AND partitioned=’NO’

AND (iot_type=’IOT’ OR iot_type is NULL)

UNION

SELECT ‘Analyze table “‘||table_name||’” validate structure cascade into invalid_rows;’

FROM dba_tables

WHERE owner=’SYS’

AND partitioned=’YES';

spool off

——————————————————————


This creates a script called analyze.sql.

Now execute the following steps:

$ sqlplus “/ as sysdba”

SQL> @$ORACLE_HOME/rdbms/admin/utlvalid.sql

SQL> @analyze.sql

This script (analyze.sql) should not return any errors.


Note:

1. ORA-30657 might occur if there is any external table validated, which can be safely ignored as per Note 209355.1 ORA-30657: Using ANALYZE TABLE for an External Table

2. Errors shown below when executing analyze.sql can be ignored:

SP2-0734: unknown command beginning “SQL> SELEC…” – rest of line ignored.

SP2-0042: unknown command “SQL>” – rest of line ignored.

SP2-0734: unknown command beginning “SQL> spool…” – rest of line ignored.

SQL> @analyze.sql

Analyze table “SYS_TZUV2_AFFECTED_REGIONS” validate structure cascade

*

ERROR at line 1:

ORA-30657: operation not supported on external organized table


2.17) Ensure that all snapshot refreshes are successfully completed

Ensure that all snapshot refreshes are successfully completed, and that replication is stopped.

SELECT DISTINCT(TRUNC(last_refresh))FROM dba_snapshot_refresh_times;


2.18) Ensure that no files need media recovery and that no files are in backup mode

Ensure that no files need media recovery and that no files are in backup mode.

SELECT * FROM v$recover_file;

SELECT * FROM v$backup WHERE status != ‘NOT ACTIVE';

This should return no rows.


2.19) Resolve outstanding distributed transactions

Resolve outstanding distributed transactions prior to the upgrade.

SQL> select * from dba_2pc_pending;

If this returns rows you should do the following:

SQL> SELECT local_tran_id FROM dba_2pc_pending;

SQL> EXECUTE dbms_transaction.purge_lost_db_entry(”);

SQL> COMMIT;

Note: no records were returned


2.20) To check if a standby database exists, issue the following query

To check if a standby database exists, issue the following query:

SELECT SUBSTR(value,INSTR(value,’=’,INSTR(UPPER(value),’SERVICE’))+1)

FROM v$parameter WHERE name LIKE ‘log_archive_dest%’ AND UPPER(value) LIKE ‘SERVICE%';

If this query returns a row, then sync the standby database with the primary database.

1. Make sure all the logs are transported to the standby server after a final log switch in the primary.

2. Start the recovery of the standby database with the NODELAY option.

2.21) Disable all batch and cron jobs

Disable all batch and cron jobs.

About jobs initiated with Oracle the packages DBMS_JOB, DBMS_SCHEDULER can be used , regarding cron jobs (external jobs controlled at the OS level), this is a task for your Unix administrator

See also :

Note 404238.1 : How to Disable an Entry from DBMS_SCHEDULER

Note 1335741.1 : How To Stop A Running Job Using DBMS_JOB

Note 67695.1 : PROCEDURE DBMS_JOB.BROKEN Specification


2.22) Check SYS and SYSTEM  tablespace


Ensure the users SYS and SYSTEM have ‘SYSTEM’ as their default tablespace.

You must have sufficient space in the tablespace or be set to extents unlimited.


SQL> SELECT username, default_tablespace

FROM dba_users

WHERE username in (‘SYS’,’SYSTEM’);


If DEFAULT_TABLESPACE is anything other than SYSTEM tablespace, modify the default tablespace to SYSTEM by using the below command.


SQL> ALTER user SYS default tablespace SYSTEM;

SQL> ALTER user SYSTEM default tablespace SYSTEM;


2.23) Check AUD$ table

Ensure that if the aud$ table exists that it is in the SYS schema and in the SYSTEM tablespace.

SQL> SELECT owner,tablespace_name

FROM dba_tables

WHERE table_name=’AUD$';

If the AUD$ table is not in SYSTEM tablespace and not owned by the SYS user then before doing the upgrade put it back to the SYSTEM tablespace and it should be owned by SYS .

Note: If the AUD$ table exists and is in use, upgrade performance can be effected depending on the number of records in the table.

For 10.2 and later source versions there is now a pre-process script available.

Please review and refer the following note  for complete information :

NOTE:1329590.1 How to Pre-Process SYS.AUD$ Records Pre-Upgrade From 10.1 or later to 11gR1 or later


2.24) Check for externally authenticated SSL users

Check whether database has any externally authenticated SSL users.

SQL> SELECT name FROM sys.user$

WHERE ext_username IS NOT NULL

AND password = ‘GLOBAL';

If any SSL users are found then few Step has to be followed after the upgrade ( refer to the documents mentioned at the end of document under ‘References’ section.


2.25) Take Backup of Configuration files

Note down the location of datafiles, redo logs and control files. Also take a backup of all configuration files like listener.ora, tnsnames.ora, etc. from $ORACLE_HOME.

SQL> SELECT name FROM v$controlfile;

SQL> SELECT file_name FROM dba_data_files;

SQL> SELECT group#, member FROM v$logfile;


2.26) Check if the  database listener is stopped

Stop the listener for the database.

$ lsnrctl stop

Previous versions of the listener are not supported for use with an Oracle Database 11g Release 2 (11.2) database. However, it is possible to use the new version of the listener with previous versions of Oracle Databases.

You must remove the old listener before creating a new one. If you attempt to create a new listener from the new Oracle Home first, and use the same name and port as the old listener, then Oracle Net Configuration Assistant returns an error.

2.27) Stop other executable such as dbconsole, isqlplus, etc.

Stop other executable such as dbconsole, isqlplus, etc.

$ emctl stop dbconsole

$ isqlplusctl stop


2.28) Shutdown the 11.1.0.7 database and take cold backup

Shutdown the database and take cold backup (more reliable)

$ sqlplus “/as sysdba”

SQL> shutdown immediate;

Back up the Database


2.29) Make a backup of the init<SID>.ora file

Make a backup of the init<SID>.ora file.

Comment out obsoleted parameters if present.

DRS_START

GC_FILES_TO_LOCKS

MAX_COMMIT_PROPAGATION_DELAY

PLSQL_NATIVE_LIBRARY_DIR

PLSQL_NATIVE_LIBRARY_SUBDIR_COUNT

SQL_VERSION


2.30) Clean Up Duplicate Objects Owned by SYS and SYSTEM schema

Refer > Note 1030426.6 How to Clean Up Duplicate Objects Owned by SYS and SYSTEM schema

Since most data dictionary objects should be owned by SYS (see exceptions below) you will want to drop the objects that are owned by SYSTEM in order to clear up this situation.

List all objects that have been created in both the SYS and SYSTEM schema:

column object_name format a30

select object_name, object_type
from dba_objects
where object_name||object_type in
(select object_name||object_type
from dba_objects
where owner = ‘SYS’)
and owner = ‘SYSTEM';

This will give a list of duplicate objects and you will simply issue the appropriate DROP command to get rid of the object that is owned by the SYSTEM user.

EXCEPTION TO THE RULE (Important!)

Please check the above mentioned note id and do not drop few objects mentioned in it which are related to replication or else it will cause replication to fail.


Part 3: UPGRADE DATABASE TO 11.2.0.3


3.1) Copy over the modified init file

Once the parameter file is modified as per your requirement (already done above), copy the file from old 11.1.0.7 $ORACLE_HOME/dbs to the new 11.2.0.3 $ORACLE_HOME/dbs.


3.2) Check Environment Variables

Make sure the following environment variables point to the Oracle 11g Release 2 (11.2) directories:

export ORACLE_BASE=/u01/oracle/<instance_name>/

export ORACLE_HOME=/u01/oracle/<instance_name>/db/tech_st/11.2.0

export PATH=$ORACLE_HOME/bin:$ORACLE_HOME/perl/bin:$PATH

export LD_LIBRARY_PATH=$ORACLE_HOME/lib

export PERL5LIB=$ORACLE_HOME/perl/lib/5.10.0:$ORACLE_HOME/perl/lib/site_perl/5.10.0

export ORA_NLS10=/u01/oracle/<instance_name>/db/tech_st/11.2.0/nls/data/9idata

3.3) Update the oratab entry

Update the oratab entry to set the new ORACLE_HOME pointing to <db_name> and disable automatic startup

/etc/oratab entries

#<instance_name>:/u01/oracle/<instance_name>/db/tech_st/11.1.0:N

<instance_name>:/u01/oracle/<instance_name>/db/tech_st/11.2.0:N

Note: After /etc/oratab is updated to have SID and Oracle Home (11.2), you can execute oraenv (/usr/local/bin/oraenv) and set the environment. The input has to be the SID which is entered in /etc/oratab against the 11gR2 home.

3.4) Upgrading Database to 11gR2

At the operating system prompt, change to the $ORACLE_HOME/rdbms/admin directory of 11gR2 Oracle Home.


$ export ORACLE_SID=<instance_name>

$ cd $ORACLE_HOME/rdbms/admin

$ sqlplus “/ as sysdba”

SQL> startup UPGRADE

Set the system to spool results to a log file for later verification after the upgrade is completed and start the upgrade script.

SQL> set echo on

SQL> SPOOL upgrade.log

SQL> @catupgrd.sql

SQL> spool off

These measures are an important final step to ensure the integrity and consistency of the newly upgraded Oracle Database software. Also, if you encountered a message listing obsolete initialization parameters when you started the database for upgrade, then remove the obsolete initialization parameters from the parameter file before restarting.


3.5) Check the upgraded database


SQL> select banner from v$version;

BANNER
———————————————————–
Oracle Database 11g Enterprise Edition Release 11.2.0.3.0 – 64bit Production
PL/SQL Release 11.2.0.3.0 – Production
CORE    11.2.0.3.0      Production
TNS for Linux: Version 11.2.0.3.0 – Production
NLSRTL Version 11.2.0.3.0 – Production


3.6) Run utlu112s.sql script

Run the Post-Upgrade Status Tool $ORACLE_HOME/rdbms/admin/utlu112s.sql which provides a summary of the upgrade at the end of the spool log. It displays the status of the database components in the upgraded database and the time required to complete each component upgrade. Any errors that occur during the upgrade are listed with each component and must be addressed.

$ sqlplus “/as sysdba”

SQL> STARTUP

SQL> @utlu112s.sql


3.7) Run catuppst.sql

Run catuppst.sql, located in the $ORACLE_HOME/rdbms/admin directory, to perform upgrade actions that do not require the database to be in UPGRADE mode.

SQL> @catuppst.sql

3.8) Run dbupgdiag.sql

Check for the integrity of the upgraded database by running dbupgdiag.sql script

Note 556610.1  Script to Collect DB Upgrade/Migrate Diagnostic Information (dbupgdiag.sql)

If the dbupgdiag.sql script reports any invalid objects, run $ORACLE_HOME/rdbms/admin/utlrp.sql (next step)

After validating the invalid objects, re-run dbupgdiag.sql in the upgraded database once again and make sure that everything is fine.

3.9) Run utlrp.sql

Run $ORACLE_HOME/rdbms/admin/utlrp.sql multiple times to validate the invalid objects in the database, until there is no change in the number of invalid objects.

Note: This step will take some considerable time on first run

Keep monitoring the invalid count by

select count(*) from dba_objects where status =’INVALID';


3.10)  Check components in dba_registry for status ‘VALID’

set lines 150 pages 500

column COMP_NAME format a45

column version format a15

column status format a12

SQL> select comp_name,version,status from dba_registry;


COMP_NAME                                     VERSION         STATUS

——————————————— ————— ————

OLAP Catalog                                  11.2.0.3.0      VALID

Oracle Data Mining                            11.2.0.3.0      VALID

Oracle XML Database                           11.2.0.3.0      VALID

Oracle Text                                   11.2.0.3.0      VALID

Spatial                                       11.2.0.3.0      VALID

Oracle Multimedia                             11.2.0.3.0      VALID

Oracle Database Catalog Views                 11.2.0.3.0      VALID

Oracle Database Packages and Types            11.2.0.3.0      VALID

JServer JAVA Virtual Machine                  11.2.0.3.0      VALID

Oracle Database Java Packages                 11.2.0.3.0      VALID

Oracle XDK                                    11.2.0.3.0      VALID

Oracle Real Application Clusters              11.2.0.3.0      INVALID

OLAP Analytic Workspace                       11.2.0.3.0      VALID

Oracle OLAP API                               11.2.0.3.0      VALID


14 rows selected.


PART 4: POST-UPGRADE STEPS


4.1) Perform patch post-install instructions

Run all the patch post install instructions except for those of 13001379 and 13366268. There is no need to run the post install instructions of 13001379 and 13366268 as they are run as part of the database upgrade.


4.2) Start the new database listener (conditional)

To start the new Oracle 11.2.0 Listener. First copy the old Oracle 11.1.0 $TNS_ADMIN directory to the new Oracle 11.2.0 $TNS_ADMIN. Be careful to change inside the files all the old references to the 11.1.0 directories to the new 11.2.0 directories.


lsnrctl start


 4.3) Set the  environment variables

copy the $ORACLE_11.1.0_HOME/SID_host.env to $ORACLE_11.2_HOME/SID_host.env, make the necessary changes to point the new 11.2.0 home and source the environment ( correct the value in .bash_profile).


4.4) Run adgrants.sql

Copy $APPL_TOP/admin/adgrants.sql from the administration server node to the database server node. Use SQL*Plus to connect to the database as SYSDBA and run the script using the following command:

$ sqlplus “/ as sysdba” @adgrants.sql (or adgrants_nt.sql)

[APPS schema name]

4.5) Grant create procedure privilege on CTXSYS


Copy $AD_TOP/patch/115/sql/adctxprv.sql from the administration server node to the database server node. Use SQL*Plus to connect to the database as APPS and run the script using the following command:


$ sqlplus apps/[APPS password] @adctxprv.sql \ [SYSTEM password] CTXSYS

4.6) Set CTXSYS parameter

Use SQL*Plus to connect to the database as SYSDBA and run the following command:

$ sqlplus “/ as sysdba”

SQL> exec ctxsys.ctx_adm.set_parameter(‘file_access_role’, ‘public’);


4.7) Validate Workflow ruleset

On the administration server node, use SQL*Plus to connect to the database as APPS and run the $FND_TOP/patch/115/sql/wfaqupfix.sql script using the following command:


$ sqlplus [APPS user]/[APPS password] @wfaqupfix.sql\ [APPLSYS user] [APPS user]


4.8)  Implement and run AutoConfig

Implement and run AutoConfig in the new Oracle home on the database server node. If the database listener of the new Oracle home is defined differently than the old Oracle home, you must also run AutoConfig on each application tier server node to update the system with the new listener.


See “Using AutoConfig to Manage System Configurations in Oracle E-Business Suite Release 12 [ID 387859.1]”

on My Oracle Support for instructions on how to implement and run AutoConfig.

Section 3.2 explains how to generate a context file on the database tier.


Step 1: Create appsutil.zip

On the application tier (as the APPLMGR user):

Log in to the APPL_TOP environment (source the environment file)

Create appsutil.zip file

perl <AD_TOP>/bin/admkappsutil.pl

This will create appsutil.zip in <INST_TOP>/admin/out


Step 2: Copy appsutil.zip to DB node and uncompress

On the database tier (as the ORACLE user):

Copy or FTP the appsutil.zip file to the <RDBMS ORACLE_HOME>

cd <RDBMS ORACLE_HOME>

unzip -o appsutil.zip


Step 3: Generate the Database Context File

Execute the following command to create your Database Context File:

perl <RDBMS_ORACLE_HOME>/appsutil/bin/adbldxml.pl


Step 4:  Run AutoConfig on the Database tier

Run AutoConfig on the Database tier by executing the below command:

On Unix:

<RDBMS_ORACLE_HOME>/appsutil/bin/adconfig.sh contextfile=<context_file>

Shut down all processes, including the database and the listener, and restart them to load the new environment settings.


4.9) Apply post-upgrade ECX patch

If you are on E-Business Suite Release 12.0, apply ECX patch 9922442.

If you are on E-Business Suite Release 12.1, apply patch 9151516.


4.10) Gather statistics for SYS schema

Copy $APPL_TOP/admin/adstats.sql from the administration server node to the database server node. Note that adstats.sql has to be run in restricted mode. Use SQL*Plus to connect to the database as SYSDBA and use the following commands to run adstats.sql in restricted mode:

$ sqlplus “/ as sysdba”

SQL> alter system enable restricted session;

SQL> @adstats.sql

$ sqlplus “/ as sysdba”

SQL> alter system disable restricted session;

SQL> exit;


4.11) Re-create custom database links (conditional)

Create as required


4.12) Re-create grants and synonyms

You must re-create the grants and synonyms in the APPS schema. On the administration server node, as the owner of the Applications file system, run AD Administration and select the  “4.    Maintain Applications Database Entities menu” and then > “Recreate grants and synonyms for APPS schema” task.


4.13) Compile Invalid Objects 

SQL>@utlrp.sql

SQL> select OWNER,OBJECT_NAME,OBJECT_TYPE from dba_objects  where STATUS=’INVALID';


4.14) Restart Applications server processes

Start the application process and do a basic check of all application services from EBS side.


4.15) Synchronize Workflow views


Log on to Oracle E-Business Suite with the “System Administrator” responsibility. Click Requests > Run > Single Request and the OK button. Enter the following parameters:


Request Name = Workflow Directory Services User/Role Validation

p_BatchSize = 10000

p_Check_Dangling = Yes

Add missing user/role assignments = Yes

Update WHO columns in WF tables = No


REFERENCES

    Interoperability Notes EBS R12 with Database 11gR2 [ID 1058763.1]
    Oracle Database Upgrade Guide 11g Release 2 (11.2)
    Complete Checklist for Manual Upgrades to 11gR2 [ID 837570.1]
    Using AutoConfig to Manage System Configurations in Oracle E-Business Suite Release 12 [ID 387859.1]
    Database Initialization Parameters for Oracle E-Business Suite Release 12 [ID 396009.1]
    Script to Collect DB Upgrade/Migrate Diagnostic Information (dbupgdiag.sql) [ID 556610.1]